The Magnolia Mood bundle, found only in the Online Exclusive section of the Stampin’ Up! online store, is a fabulous new floral combination with which you can create magnolias so beautiful you can almost smell them. Stamp, then die cut a single flower or a bouquet to use on cards or other paper crafts. For a striking effect, stamp the image on a card, then layer detailed die cuts over it. You’ll love how it looks!
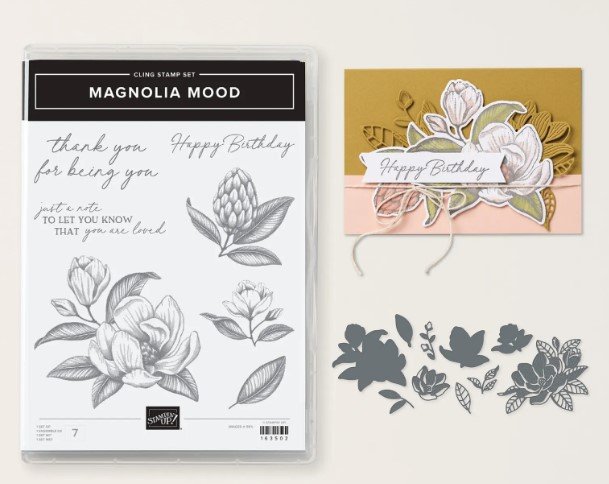
Flowers make everything sweeter, so sweeten your cards and paper crafts with the Magnolia Mood Stamp Set. Stamp a magnolia in a single color—you don’t need more than that because the detailed artwork adds depth. Or color the magnolias using your favorite colors and coloring tools for a stepped-up look. Finish your card with a sentiment to wish someone a happy birthday or to let them know that you’re there for them. Whatever you do, you’ll love the result!
For info about my upcoming in-person and virtual classes, check out my class descriptions here and my calendar here. For more ideas every month, be sure to sign up for my weekly newsletter at the bottom of this page. Thanks for checking this out!
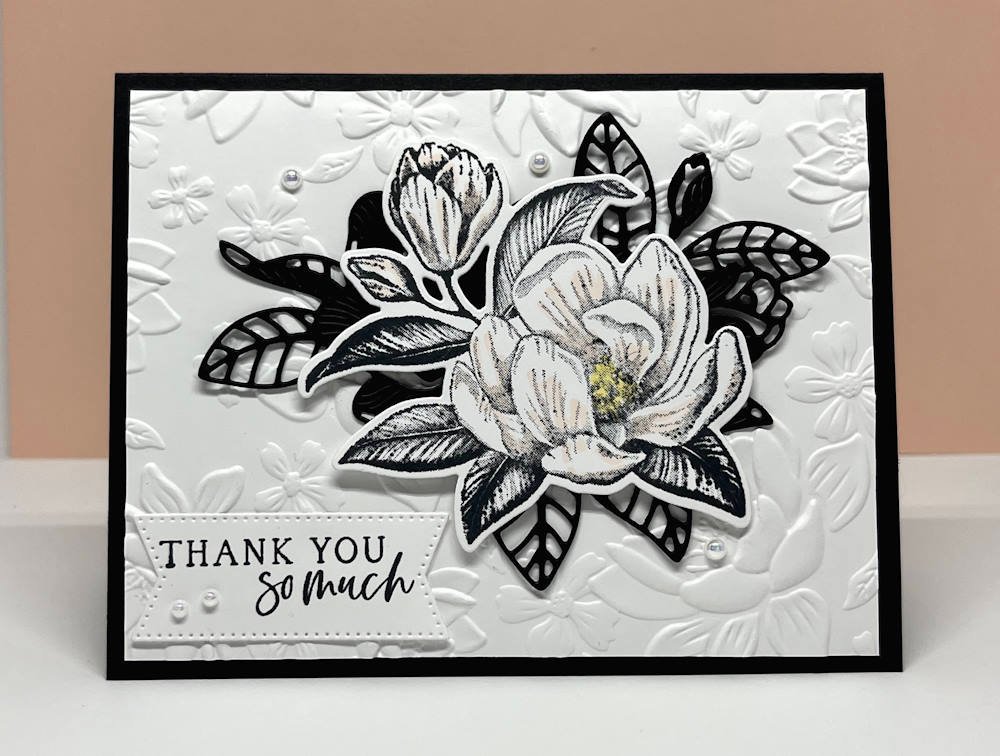
Magnolia Mood Card Measurements:
- Basic Black – 8 ½” x 5 ½”, score and fold at 4 ¼”, and 4”x 4”
- Basic White – (2) 5 ¼” x 4”, 3 ½” x 3 ½”, and 3” x 1 ¼”
Instructions:
- Emboss a 5 1/4” x 4” Basic White panel with the Layered Florals 3D EF. Adhere to the card front.
- Die-cut the Basic Black panel with the large, detailed magnolia die. Set aside.
- Tuxedo Black ink stamps the magnolia image on the square Basic White panel. Color the highlighted areas of the flower with dark Petal Pink Blends and the center with Light Lemon Lolly Blends marker.
- Use Tuxedo Black ink to stamp the sentiment on the 3” x 1 ¼” scrap of Basic White cardstock. Die-cut with the second-smallest Stylish Shapes banner die. Dimensional in the lower left corner, as shown.
- Glue the black magnolia die-cut, then dimensional the stamped magnolia over it, as shown.
- Scatter a few Iridescent Pearls.
- Glue the final 5 ¼ x 4” Basic White layer inside the card and decorate as desired.


0 Comments