

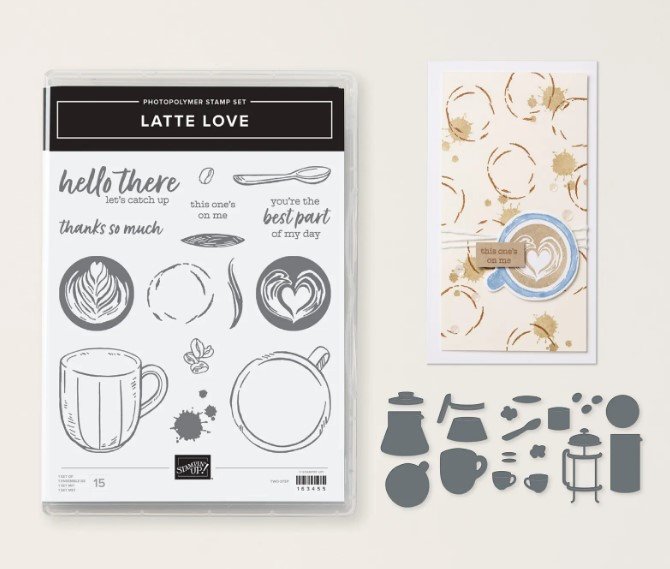
The Latte Love bundle from Stampin’ Up! is one of the many Online Exclusives offered in our online store, meaning they aren’t found in any catalog. With the stamps, dies, designer series paper (DSP), ribbon and embellishments, you can create breakfast-themed projects featuring coffee and chocolate mug designs, coffee beans, and breakfast accessories perfect for making a breakfast table scene! Or make cards focused on your loved ones’ favorite beverage and send friendship cards in a latte of style!
I love that this card features an easy fun fold that we have used before. By layering different A Latte Love DSP designs, we create a lot of interest with the card. And bonus – the mugs are from a sheet of the DSP as well and have a coordinating die cut so cutting it out is simple!
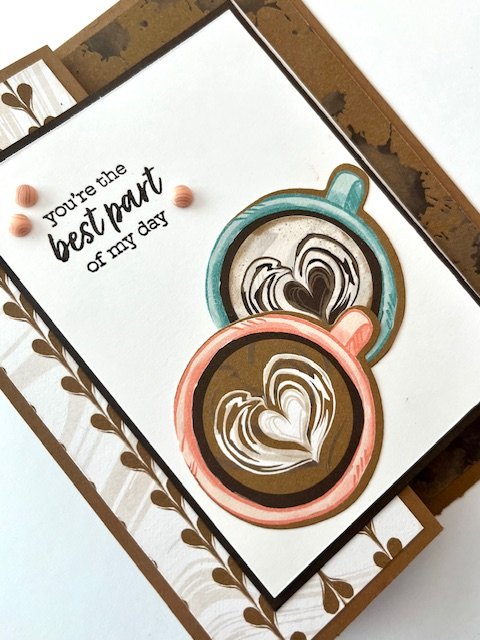
Below is the tutorial for the card featured above. For more ideas every month, be sure to sign up for my weekly newsletter at the bottom of this page. For info about my upcoming in-person and virtual classes, check out my class descriptions here and my calendar here. Thanks for checking this out!
Latte Love Card Measurements:
- Pecan Pie Base: 5 1/2” x 8 ½” – Score at 2 1/8” and 4-1/4”
- Designer Series Paper Coffee Splatter: 4” x 5 ¼”
- Designer Series Paper Heart Stripes: 1 7/8” x 5 ¼”
- Early Espresso: 3 3/16” x 4 3/8”
- Basic White: 3 3/16” x 4 3/8” and 3” x 4 3/16”
Instructions:
- Die cut two coffee cup tops from the Designer Series Paper
- Attach to the 3” x 4 3/16” piece of Basic White using Stampin’ Seal.
- Stamp sentiment in Early Espresso ink in upper left corner.
- Fold base in middle and then fold back on the 2 1/8” score line.
- Attach the 4” x 5 ¼” piece of Designer Series Paper to the inside of the card using Stampin’ Seal..
- Attach the 1 7/8” x 5 ¼” strip of Designer Series Paper to the folded-back flap using Stampin’ Seal.
- Attach the Basic White stamped layer to the Early Espresso layer using Stampin’ Seal.
- Place Stampin’ Seal on only the left edge of the Early Espresso cardstock (depending on how you flip over to apply adhesive – it might be the right side)
- Attach to the flap.
- With the card open, lay the 3 3/16” x 4 3/8” piece of Basic White on the back of the Early Espresso.
- Apply Stampin’ Seal to the Basic White and then close the back of the card – this allows you to align the Basic White on the inside of the card under the front panel.
- Add Swirl Dots around the sentiment to finish the card.
Latte Love Card Supplies:
")
 Designer Series Paper")


0 Comments