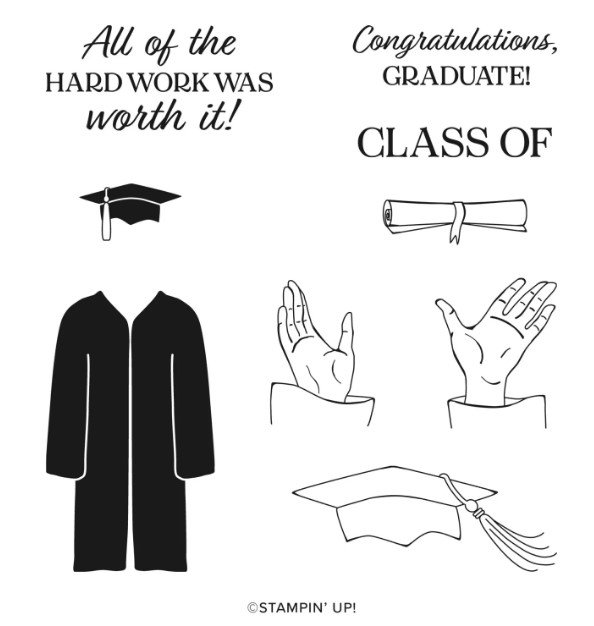
Celebrate the hard work and achievement of graduates with a handmade card! The Cap & Gown Stamp Set features stamps that can be combined or used separately on paper projects, cards, gift tags, and more to wish happy graduation to nephews, nieces, grandchildren, friends, and all of those who deserve some congratulations! The gown image can be stamped in any color and used as focal point on a card front; the open line-art cap and hand images can be custom-colored with the coloring tool of your choice or stamped multiple times on a project; the hands image can hold the diploma or you can line them up along the bottom of the card to show caps thrown in the air.
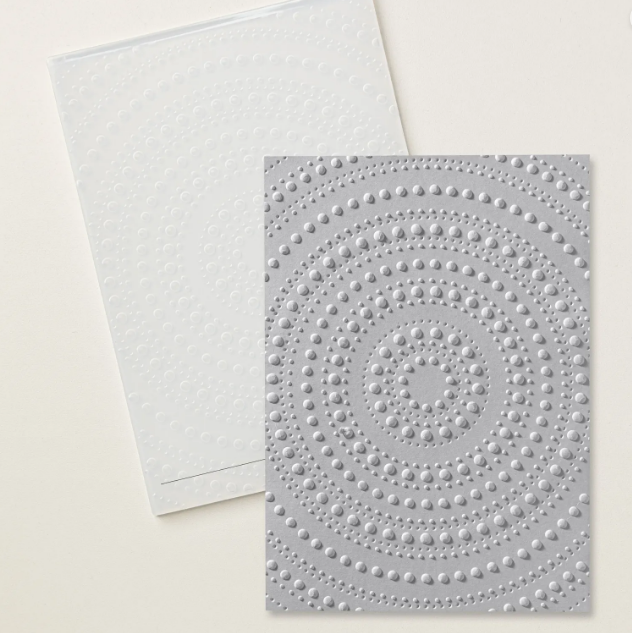
This card also features the new GIANT Dotted Circles 3D embossing folder. The mesmerizing circle patterns are perfect for paper craft backgrounds. You can even fussy cut around the circles to bring detail and texture to things like handmade cards, paper banners, and gift tags. This embossing folder is easy to use and is a quick way to add a fun design to any paper creation. I just love how it can zero attention in onto a focal point image!
Below is the tutorial for the card featured above. For more ideas every month, be sure to sign up for my weekly newsletter at the bottom of this page. For info about my upcoming in-person and virtual classes, check out my class descriptions here and my calendar here. Thanks for checking this out!
Cap & Gown Card Measurements:
- Thick Basic White – 8 ½” x 5 ½”, score and fold at 4 ¼”
- Basic White – 2 ¾” square + scraps.
- Blueberry Bushel – 5 ¼” x 4” + small scrap
Instructions:
- Emboss the Blueberry Bushel panel using the Dotted Circles 3D embossing folder, offsetting the center of the circles to the right.
- Die-cut the Basic White square with the second-to-largest Stylish Shapes circle. Stamp the sentiment in the center using Blueberry Bushel ink.
- Stamp the small mortarboard with Blueberry Bushel on white scrap, then use Snips to cut out and dimensional the cap onto the circle, as shown.
- Use Tuxedo Black ink to stamp the diploma on a scrap. Optionally, use a black ballpoint pen to add the school initials and year on the diploma, then cut around it. Snip the banner flush with the diploma for ease of cutting. Stamp the banner part of the diploma on a scrap of Blueberry Bushel then cut out and paper-piece over the diploma. Dimensional onto circle, as shown.
- Add gold 1/8” trim to the back of the circle (securing with tape or dimensionals) then dimensional onto the Blueberry embossed panel. Trim the right side of the circle flush with the side, if necessary. Adhere to the card front.
- Scatter a few adhesive-backed sequins.
- Decorate the inside as desired.
Cap & Gown Card Supplies:
")


 Trim Combo Pack")


0 Comments