Whether you want something groovy or a little more elegant, the Flowering Zinnias Suite Collection has everything you need to create a wide range of all-occasion crafts! The stamps and dies work perfectly together to create flowering zinnias that burst right from the page. Use the vibrant crafting paper as card backgrounds or for die-cut flowers and greenery. And the bright embellishments will sparkle in your designs. So if you want to make groovy gift tags or thoughtful thank-you cards, this suite just can’t be beat!
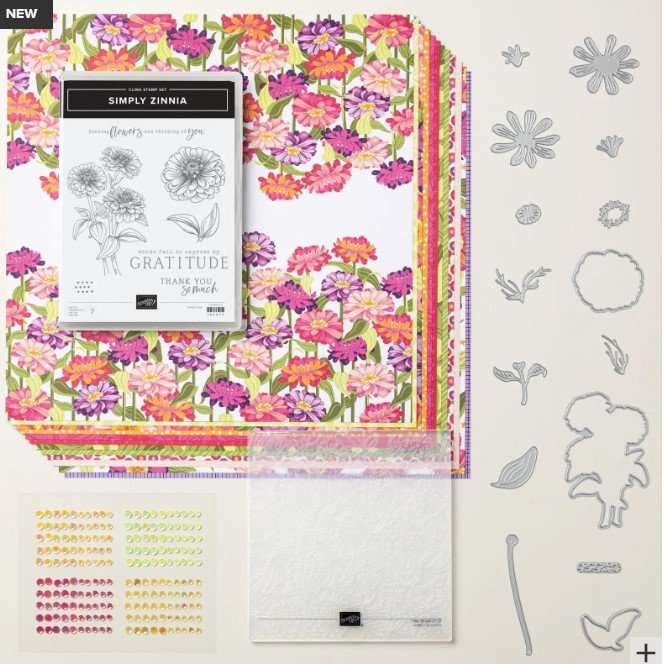
The Flowering Zinnias Suite Collection includes:
SIMPLY ZINNIA STAMP SET (10% off)
* 7 cling stamps
* Suggested clear blocks (sold separately): c, d, e, h
SIMPLY ZINNIA DIES (10% off)
* 15 dies
* Largest die: 2-1/2″ x 4″ (6.4 x 10.2 cm)
* Use with a Stampin’ Cut & Emboss Machine
* Compatible with the Mini Stampin’ Cut & Emboss Machine
ZINNIA 3D EMBOSSING FOLDER
* 1 folder
* Size: 6″ x 6-1/4″ (15.2 x 15.9 cm)
* Use with a Stampin’ Cut & Emboss Machine
FLOWERING ZINNIAS 12″ X 12″ (30.5 X 30.5 CM) DESIGNER SERIES PAPER
* 12 sheets of patterned paper: 2 each of 6 double-sided designs
* Acid free
* Lignin free
ADHESIVE-BACKED SHINY SEQUINS
* 200 sequins
* 4 mm, 5 mm
* Lemon Lime Twist, Lemon Lolly, Melon Mambo, Pumpkin Pie
Product colors: Berry Burst, Blackberry Bliss, Flirty Flamingo, Highland Heather, Lemon Lime Twist, Lemon Lolly, Melon Mambo, Mossy Meadow, Old Olive, Petal Pink, Pumpkin Pie, Real Red
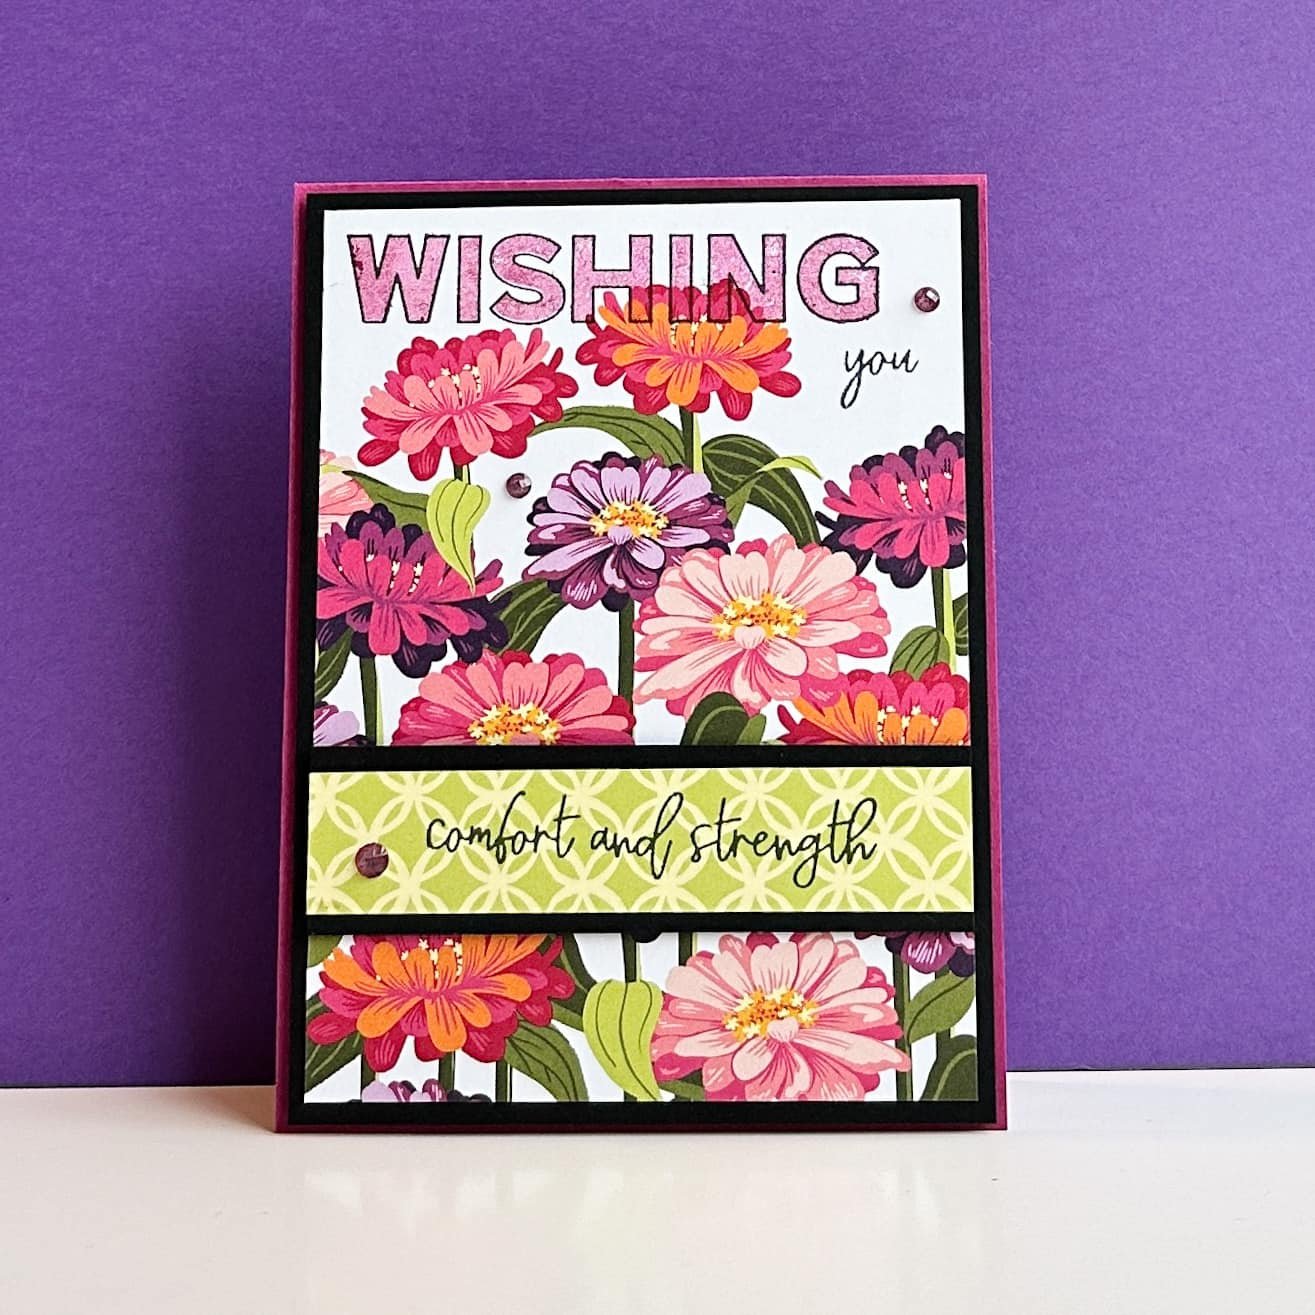
Below is the tutorial for the card featured above. For more ideas every month, be sure to sign up for my weekly newsletter at the bottom of this page. For info about my upcoming in-person and virtual classes, check out my class descriptions here and my calendar here. Thanks for checking this out!
Flowering Zinnias Card Measurements:
- Berry Burst – 4 ¼” x 11”, fold at 5 ½”
- Flowering Zinnias DSP – 3 7/8” x 5 1/8”, 1” x 4” (reverse side from same paper)
- Basic White – 4” x 5 ¼”
- Basic Black – 4” x 5 ¼”, ½” x 4” (2 strips)
Instructions:
- Create Berry Burst card base.
- Cut Zinnias DSP, both pieces. Make sure to allow white space at top of DSP panel.
- Ink up “Wishing” sentiment in Berry Burst, stamp off on scrap paper and then stamp at top of DSP. Ink up Outline stamp in Tuxedo Memento Black and stamp over the Berry Burst.
- Attach black strips to back of green trefoil pattern to allow 1/4” to show top and bottom. Stamp sentiment
- Attach DSP to Black. Adhere to Berry Burst card base with stampin’ dimensionals.
- Attach green strip to card front with Stampin’ Dimensionals.
- Add 3 Purple Shimmer Gems.


0 Comments