

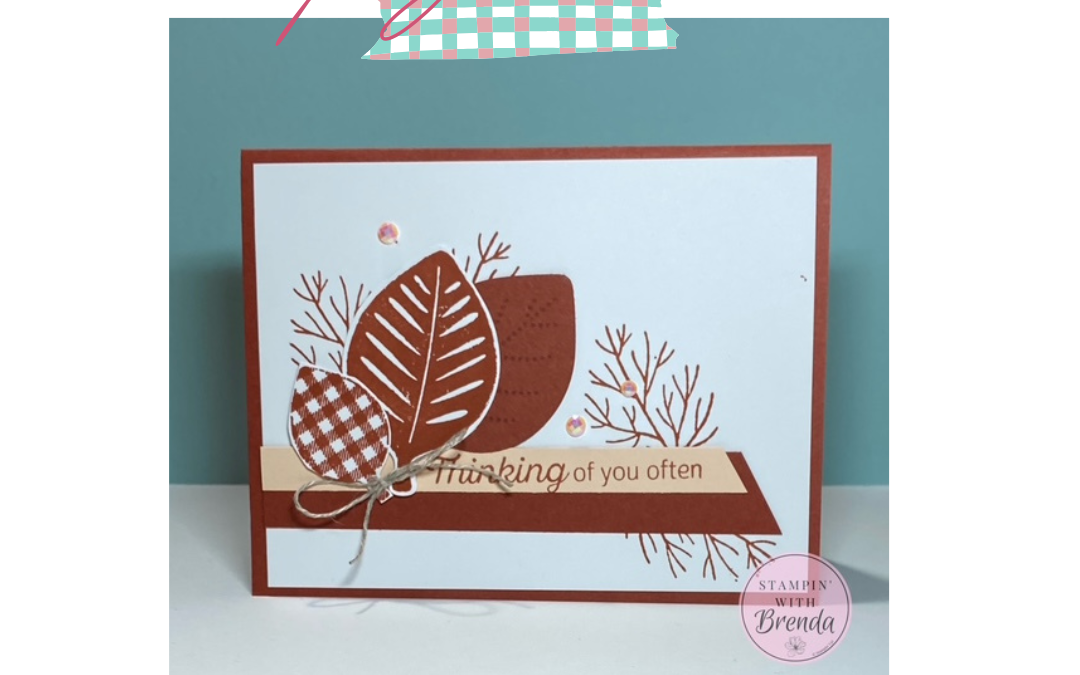
This Fern & Flora card was one of the projects from my June Cards & Company Zoom Class, and it is such a pretty mix of soft colors, layered die cuts, and beautiful patterned paper.
I love when Designer Series Paper can do a lot of the work on a card, and this Moonlit Flora paper is a perfect example. The deep leafy background gives the card so much depth, while the Cloud Cover arch and delicate Fern & Flora die cuts create a soft focal point. The little touches of Golden Glow add just the right amount of contrast.
This is a great “thankful for you” card, but you could easily change the sentiment and use the same layout for a birthday, thinking of you, sympathy, or friendship card.
Get a downloadable copy of the tutorial HERE.
Moonlit Flora Card Details
For this card, I used a Mossy Meadow card base with layers of White Willow and Moonlit Flora Designer Series Paper. The focal point is created with a Cloud Cover arch layered with Fern & Flora die cuts in White Willow, Old Olive, and Golden Glow.
The sentiment is stamped in Mossy Meadow ink and layered across the bottom of the arch, giving the card a clean finish without covering too much of the beautiful background.
Supplies and Measurements
Card Base and Layers
Mossy Meadow Card Base: 5 1/2″ x 8 1/2″, scored at 4 1/4″
White Willow: 4″ x 5 1/4″, cut 2
Moonlit Flora Designer Series Paper: 4″ x 5 1/4″, cut down to 3 3/4″
Cloud Cover Two-Toned Cardstock: 4″ x 3″, die cut with Everyday Arches die
Die Cuts and Sentiment Pieces
White Willow: 1″ x 2 1/2″, die cut with Fern & Flora die
White Willow: 1 1/2″ x 4″, die cut with Fern & Flora die
Golden Glow Two-Toned Cardstock: 1/2″ x 3 1/2″, cut 2
Golden Glow Two-Toned Cardstock: 3″ x 1″, die cut with Fern & Flora die
Old Olive Two-Toned Cardstock: 1 1/4″ x 3″, die cut with Fern & Flora die
Finishing Touches
Moody Palette Glossy Dots: 3
Mossy Meadow ink pad
Dimensionals
Wet adhesive
How to Make the Moonlit Flora Card
- Fold the Mossy Meadow card base on the score line. Adhere one White Willow panel to the inside of the card.
- Adhere the second White Willow panel to the card front. Add the Moonlit Flora Designer Series Paper panel to the center of the card front.
- Adhere one Golden Glow strip to the lower third of the card front with the dark side up, slightly to the right of center. Add the second strip with the lighter side up, overlapping the first strip and placing it slightly to the left of center.
- Add the Cloud Cover arch using dimensionals, placing it slightly lower and to the right of center so it overlaps the Golden Glow strips.
- Using wet adhesive, layer the Fern & Flora leaf die cuts in the center of the arch, allowing the bases of the leaves to overlap.
- Stamp the sentiment on the White Willow label using Mossy Meadow ink. I used a sentiment from Fern & Flora. Adhere the label over the junction of the leaf die cuts using dimensionals.
- Add three Moody Palette Glossy Dots as desired.
Design Tip
When layering several die cuts together, start by arranging them without adhesive first. Once you like the placement, snap a quick photo with your phone or hold them in place while adding small dots of wet adhesive. This gives you a little wiggle room and helps keep the focal point from feeling too crowded.
Final Thoughts
This Moonlit Flora card has such a pretty garden feel, and the mix of soft blue, deep green, white, and golden yellow makes it feel fresh but still elegant. It’s a beautiful example of how a few simple layers and die cuts can turn patterned paper into a card that feels really special.
Cards like this are exactly why I love Cards & Company. We get to make pretty, useful cards together on Zoom, and everyone ends class with finished cards ready to send.
For info about my upcoming in-person and virtual classes, check out my class descriptions here and my calendar here. I hope to see you at a class sometime soon, but you can always find ideas here on my blog as well as on Facebook and Instagram. Subscribe to my weekly newsletter at the bottom of this page so you don’t miss a thing!
0 Comments