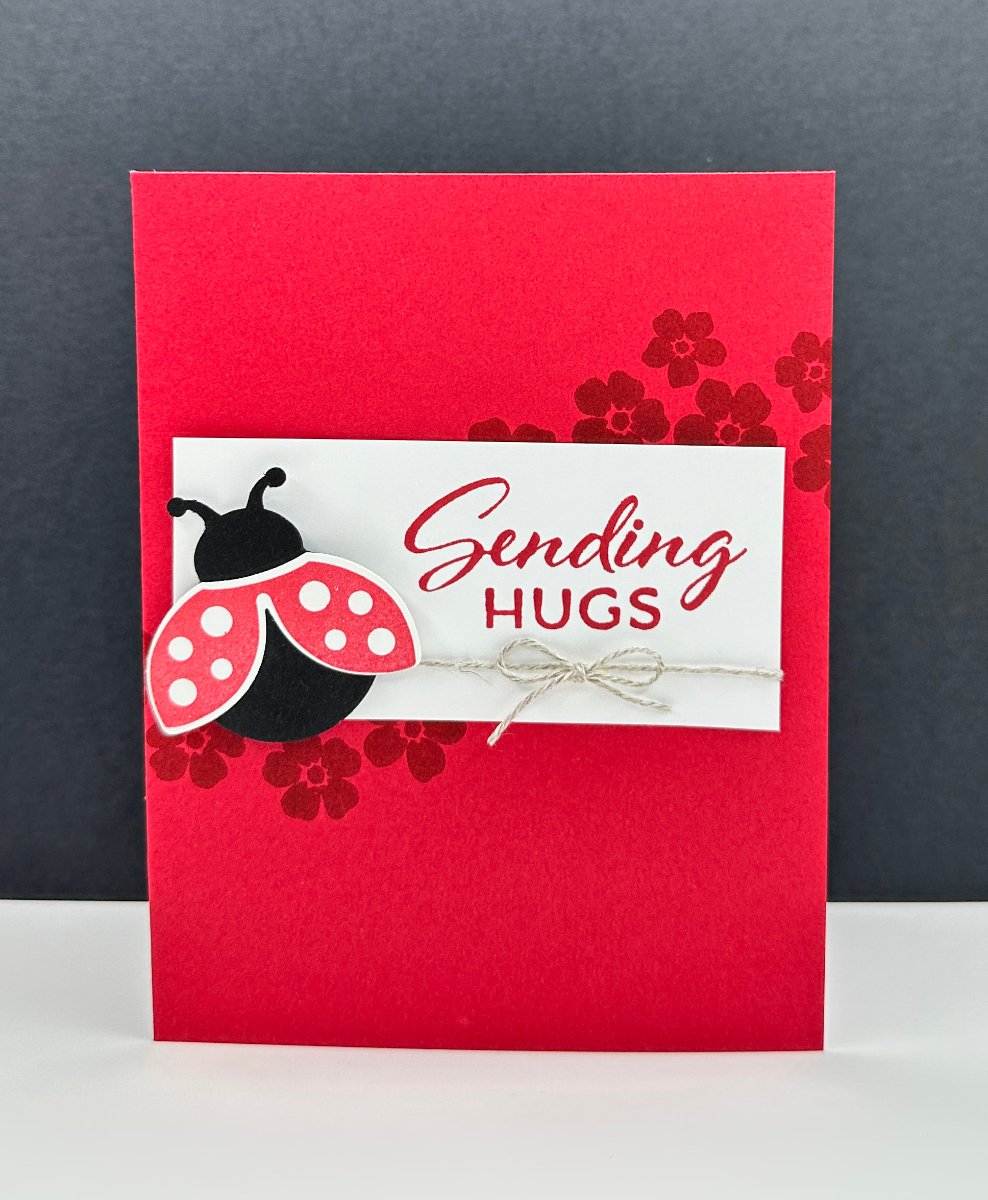
Not all red cards are about Valentines Day this week! Hello Ladybug is a Stampin’ Up! stamp set and coordinating punch that scream RED (at least to me!) And, it actually makes a perfect Valentines Day card should you want it to, especially when sending greetings to friends. A hug is good for any day of the year, right?
I love the simplicity of this card – the red-on-red stamping in the background really pop. And I know the ladybug isn’t quite right – the spots are usually black – no one will notice and it blends to make a perfectly sweet card.
Here’s a quick tutorial to make this card, or a dozen!
Ladybug Card Measurements:
- Basic White Cardstock – 1 ¾” x 3 ¾”; scrap
- Real Red Cardstock – 5 ½” x 8 ½”; score and fold at 4 ¼”
- Basic Black Cardstock – 2” x 2”
Instructions:
- Stamp your flowers in Real Red ink onto Real Red cardstock.
- Stamp your wings onto scrap piece of Basic White cardstock in Real Red ink and punch out.
- Stamp your sentiment in Real Red ink onto remaining piece of Basic White cardstock.
- Punch out body of ladybug in Basic Black cardstock.
- Use Liquid Glue to attach the ladybug wings to the ladybug body.
- Wrap a piece of Linen Thread around your sentiment layers, securing the tails to the backside with Stampin’ Seal.
- Add sentiment layer to your card base.
- Add ladybug to your card with Dimensionals.
- Tie a bow with Linen Thread and add to your card with Liquid Glue.
Card Supplies:
For info about my upcoming in-person and virtual classes, check out my class descriptions here and my calendar here. I hope to see you at a class sometime soon, but you can always find ideas here on my blog as well as on Facebook and Instagram. And subscribe to my YouTube channel @brendamillersu so you don’t miss any of my weekly Quick Classes!


0 Comments